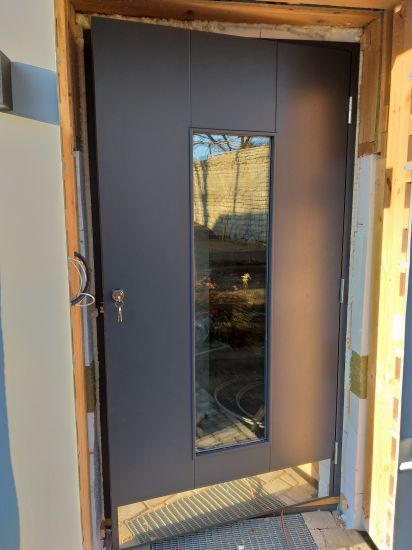
Installation instructions for metal doors

  1. Use rubber, cardboard, wood, or plastic materials to protect the floor or ground when supporting the door.
  2. Check the suitability of the existing installation opening. The maximum allowed dimensions for the installation opening are: width of the frame +40 mm and height +20 mm. For frames with sleeves, the width is +30 mm and height +15 mm. In the case of larger gaps, adjust the installation opening to the required dimensions.
  3. Check the availability of fasteners and tools.
  4. Clean the installation opening.
  5. To assemble the frame on-site, connect the frame components together and secure them with fasteners (figure 3). Attach the blocks to the frame using screws or spring pins (figure 3, view B), except for the 5mm strip package, which is attached with concealed head bolts (figure 3, view C). Use a spring pin if the tap’s height from the floor is less than 10mm. Otherwise, use screws. For on-site assembled frames, mark the threshold and post cut line on the external side of the door. Apply sealant to the threshold tap facing the exterior. Sealants like Soudal Soudaflex 40FC, Soudal Silirub 2/S, or Penosil General Silicone can be used.
  6. Place the frame without the door leaf in the center of the installation opening, flush with the wall surface (for frames with trim) or deeper (for recessed frames).
  7. Check the horizontal alignment of the door leaf and/or frame’s upper post with a spirit level. If needed, support the door leaf with support blocks at its extreme points and the center to prevent sagging when stepped on.
  8. 8.1. Sleeveless frame: Align the hinge side of the frame and drill through the upper fixing hole #1 (figure 1) with a 10 mm diameter drill, to a depth of up to 120 mm. Insert a dowel into the hole through the frame hole, fixing the dowel before the screw. Then, using a socket wrench, turn the screw deep enough so that the gap between the installation opening and the frame is equal on both sides, unless otherwise specified. Then, place spacer blocks (plastic, wood, metal blocks) between the frame and the wall, against the fixing screw. Then, tighten the screw. Repeat the process for the lower hinge hole #2 and the upper opposite fixing hole #3. Check the vertical alignment of the frame’s side surfaces with a spirit level. Level the latch side of the frame and secure it at fixing point #4.
    8.2. Frame with sleeves: Align the frame and adjust the sleeves against the supporting surface. Distancing blocks are not needed. The maximum projection of the sleeve from the frame’s rear surface is 15 mm (figure 2). If the sleeve does not reach the wall, use additional supports. Use ESSVE fasteners designated for sleeves (subsection 1 Tools and Fasteners). Start attaching the frame based on point 8.1.
  9. Before lifting the door leaf onto the hinges, lubricate the bearings and hinges. Avoid getting lubricant on the outer surfaces of the hinges. Remove excess lubricant.
  10. Lift the door leaf onto the hinges, ensuring uniform gaps between the frame and the door leaf, as well as parallel surfaces. Adjust using screws and correct the thickness of the support blocks if necessary. For frames with sleeves, if necessary, loosen the fastening screw and adjust the gaps and surface parallelism using a hex key for sleeve adjustment. Tighten the fastening screws.
  11. Drill all remaining fixing holes and secure screws, dowels, and support blocks, then tighten the screws. Support blocks must be installed next to all fixing screws (except for frames with sleeves).
  12. The frame can also be attached using Ø10 steel rods, fixing the frame to the rod using a weld. Welding work should be performed by a trained welder. When installing with rods, welding is mandatory, meaning that the rod must be welded to the frame at all fixing points (installation of distancing blocks is not necessary). If possible, two central attachments must be made with bolts.
  13. Close the frame fixing holes with plastic caps.
  14. Seal the gap between the installation opening and the frame using mineral wool or construction foam. Intended for the frame’s side parts, upper part, and the lower part of the door leaf.
  15. When sealing with foam, ensure that all areas around the perimeter are uniformly filled, including the area below the threshold (if possible). Follow the foam manufacturer’s instructions when applying foam. Prior to applying foam, cover the frame with painter’s tape to prevent foam from getting on the exterior surface of the frame.
  16. After installing the door, check the uniformity of gaps between the frame and the leaf, which should be even. Also, check the door leaf’s uniform contact with the seals and adjust if necessary.
  17. Install the door lock(s) and other fittings (lock cylinder, handle, cover plates, lock strike, closer, etc.) according to their installation instructions. For installing the lock case and strike, drill holes and use wood screws for fastening.
  18. Check the closing of the door’s locking tongue (and other lock tongues) and their operation when opening and closing the door. Verify that the door locks correctly, can be opened and locked from both sides with keys. For double-sided doors, also check the closing of the latches.
  19. After sealing gaps, finish them with plasterboard, plaster, or cover with a metal strip fixed with drive-in clips.
  20. On exterior doors, seal the gaps between the threshold and the floor. Seal both sides – internal and external. For frames covered with a casing profile, seal the gaps between the frame and the wall on the external side. Sealants like Soudal Soudaflex 40FC, Soudal Silirub 2/S, or Penosil General Silicone can be used.
  21. On construction sites, it is mandatory to cover the door leaves with protective film. Remove excess film or fold it over the door and secure with tape. On exterior doors, cut the film flush with the bottom edge of the door leaf, leaving the bottom open to allow rainwater and moisture to escape.
  22. After completing the work, clean the product from dust, fingerprints, excess grease, and wipe away debris accumulated at the workplace.